
This guide to halloween crochet patterns covers practical choices, techniques and related Yarnivelle resources for your next crochet project.
3 essential tips to remember
- Follow the mini-ghost tutorial’s round counts for its shape.
- Plan facial embroidery before closing the piece.
- Choose hanging and decorative components for the intended display.
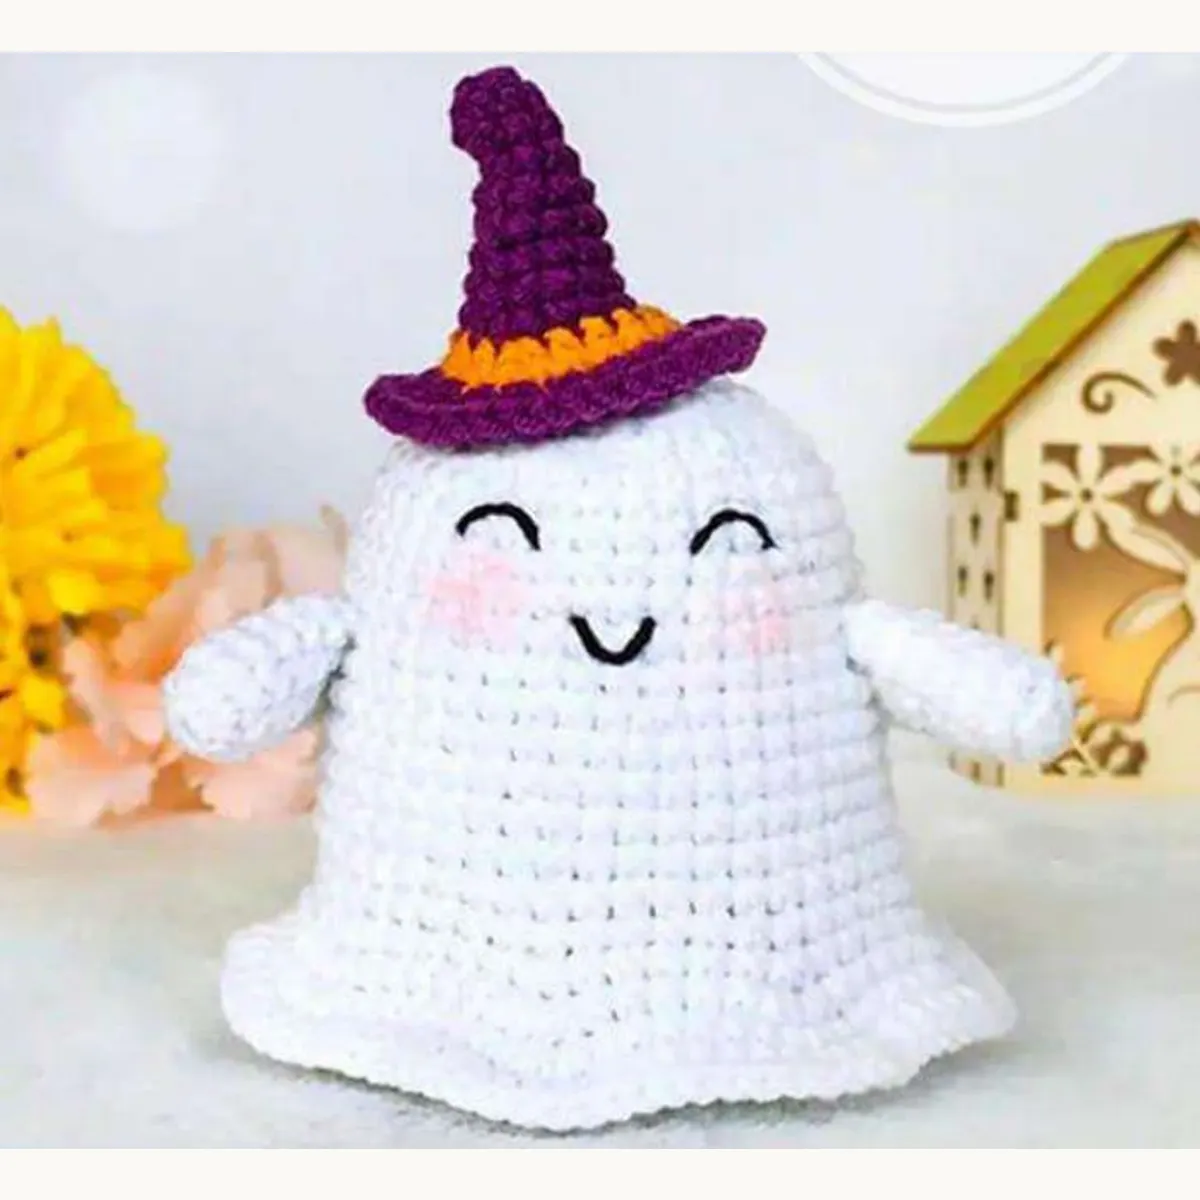
A little white ghost is an easy way to add handmade charm to Halloween. This free Halloween crochet pattern creates a small, hollow ghost decoration with a rounded head, straight body, and gently wavy lower edge. It is not a stuffed plush toy, so there is no need for stuffing or sewing two pieces together.
The pattern uses US crochet terminology and works well for crafters who already know single crochet and how to make a magic ring.
Quick pattern information
- Project: Mini hollow ghost decoration
- Skill level: Beginner familiar with crocheting in the round
- Yarn: Smooth white #4 worsted-weight yarn
- Hook: About 3.5–4 mm, adjusted for your tension
- Extras: Black embroidery yarn, yarn needle, stitch marker, scissors
- Construction: Continuous rounds, finished with a wavy hem
Stitches and abbreviations
MR = magic ring; sc = single crochet; inc = 2 sc in one stitch; hdc = half double crochet; st = stitch; rnd = round.
Work in a continuous spiral; do not join at the end of each round. Place a marker in the first stitch of each round, moving it up as you work.
Easy mini ghost crochet pattern
Head
- Round 1: 6 sc in MR. (6)
- Round 2: Inc in every stitch. (12)
- Round 3: (Sc in next stitch, inc in next) 6 times. (18)
- Round 4: (Sc in next 2 stitches, inc in next) 6 times. (24)
You now have a rounded top for the ghost. Pull the starting tail snug so the top closes.
Body
- Rounds 5–10: Sc in each stitch around. (24 per round)
The body will naturally begin to drop below the rounded head, forming a short open-bottom tube.
Soft wavy hem
- Round 11: (Sc in next stitch, 2 hdc in next stitch) 12 times. (36 stitches made)
Slip stitch into the first stitch of Round 11 to finish the edge. Cut yarn and weave in ends on the inside. Gently shape the hem with your fingers.
Result: A small hollow crocheted ghost that can be slipped over a small display cone or hung from a securely attached loop. It won’t necessarily stand by itself because the base is open.
Add a simple ghost face
If you would like to try a different expression, our guide to embroidering amigurumi eyes and faces explains thread, placement, and tidy finishing.
Thread black yarn through a needle. Embroider two small eyes across the front of the head using short, secure stitches. Add a tiny curved mouth if you like. Before making the final knots, view the ghost from the front to check that the features look balanced.
Important: If the finished item might be handled by a young child, use tightly secured embroidery rather than detachable plastic eyes. For seasonal hanging displays, keep the decoration and any cords out of children’s reach.
Five ways to decorate with crochet ghosts
Hang a tiny garland
Make several ghosts in white, pale lilac, or soft gray, then hang them on a separate cord in a location where the decorations are safe and cannot be pulled down.
Create a desk display
Slip a ghost over a small stable cardboard cone. Place it beside paper pumpkins or an autumn leaf arrangement.
Add a gift topper
Attach a ghost to reusable ribbon for a Halloween gift. It can be removed and displayed after the gift is opened.
Make a spooky table setting
Place one little ghost near each place card, away from candles, food, and hot items.
Personalize your colors
White is classic, but pale peach, mint, and lavender make a playful pastel Halloween palette.
Troubleshooting your crochet ghost
Why is the top pointed? Pull the ring closed and distribute the first increase rounds evenly. Tension differences can affect the dome.
Why is the opening uneven? Count 24 stitches in each body round before working the hem.
Why doesn’t the ghost stand? This design is intentionally hollow and open at the bottom. Use a stable display form or a hanging loop rather than expecting a freestanding plush shape.
Why do I see gaps? Try a slightly smaller hook. The fabric should have a fairly even texture, but this decoration does not need to hold stuffing.
FAQ: Halloween crochet patterns
Can I use plush yarn for this ghost?
Yes, but thicker fuzzy yarn changes the size and makes stitches harder to count. Use a larger appropriate hook and expect a softer, less-defined edge.
Is this an amigurumi toy?
It uses common amigurumi techniques, but the finished design is a hollow decoration, not a stuffed toy.
Can I make a larger version?
Use thicker yarn and an appropriate hook for a larger result. For a substantially larger ghost with the same proportions, you’d need to redesign the stitch counts as well.
Once you’ve made one ghost, use it to practice consistent rounds—and save your seasonal color ideas for the next holiday craft.
Continue learning at Yarnivelle
- How to Make a Magic Ring in Crochet: Beginner Step-by-Step Guide
- Easy Amigurumi Patterns for Beginners: Start with a Mini Crochet Ball
- Easy Crochet Christmas Ornaments: Free Mini Star Pattern and Gift Ideas
Related crochet PDFs: Want to keep crocheting small figures after this free ghost? little hen keychain PDF and puppy keychain PDF. These product pages offer digital crochet instructions, not finished handmade items.
Browse more patterns and project inspiration at Yarnivelle.
Explore crochet PDF patterns from Yarnivelle
Enjoyed the Halloween mini ghost? Explore more spooky and playful crochet PDFs for your next seasonal make. Every listing is a digital crochet PDF pattern, not a finished crocheted item or supplies.

More free crochet tutorials: Explore the Yarnivelle Crochet Blog.
For general abbreviation and yarn-symbol references, consult the Craft Yarn Council standards. Follow the terminology and stitch instructions in the particular pattern you are using.
[…] Free Halloween Crochet Pattern: Easy Mini Ghost Decoration […]